Friday, 23 July 2010

(Not) Focussing on the Background

It is pretty well impossible to take a really good photograph that does not have something in focus. Something sharp to give meaning to the picture. I have suggested in the past that this could be just the visible grain in the picture but I could be clutching at straws with that idea, trying to justify some poor effort on my part... No, I really think that there needs to be something to grab the viewer's attention.

However, the presence of something sharp in the picture does not make it a good picture, often the parts of the photograph that are out of focus do more to elevate the picture into something really nice.

Out of focus stuff is more likely to be important in terms of shape and colour, I could tell you that the yellow behind the poppy seed-head is a pair of marigolds (the flowers, not the rubber gloves) but it is irrelevant to the reading of the picture. In the picture of the roses it is obvious that the colour behind is more roses but it really helps to highlight the stems.

When you take a picture you need to think about the layers, the foreground, the focussed areas and the background: will the aperture you are using give you enough depth for the subject and at the same time allow you to soften the fore and background? If you are shooting with toy cameras you often don't have the luxury of choice but you can still be aware of what will happen and choose the angles to put interesting stuff in the out of focus areas.


In my Pylon picture I would have liked to get the wires themselves slightly further out of focus but here the softness gives height to the pylon where sharp wires would have created confusion - did I get away with it? Just, I think.

This is one of the most fundamental skills to learn as a photographer, knowing - preferably instinctively - how much to get sharp and always looking at what is going on in the background so that you can accommodate it into your picture - or avoid it.

Photography, for me, is exciting because of the things you can do with it that are not normally visible, and the juxtaposition of sharp and blurred is among the most thrilling.

This final picture is not one of mine, it couldn't be since it was shot in the very early '60's, around when I was born. It is a portrait of actress Jean Marsh taken by my father Brian Shuel. I knew as soon as I decided the subject for this blog that this picture should be included to illustrate what I mean. If the tree were either sharp or not there the picture would be the poorer for it. I really love this picture and I'm grateful to my dad for letting me use it.

When you are taking pictures look at everything, and let you mind focus as well as your camera, not only on the subject but also on the picture that the subject will become...

Sunday, 18 July 2010

Playing at Being a Photographer...

I bang on in my blog about learning the fundamentals of photography from using basic equipment and materials because I think it is the best way to learn. However, I know that for most people the film and Holga concept is a bit of fun that they will dabble with from time to time (if at all) so I thought it would be a good idea if I were to explain why I feel it is so important.

I am not a commercial photographer but I do have one commercial client, my lovely wife Laura. Laura is an artist, specialising in lino and woodblock printing, though she also works in vitreous enamel (www.lauraboswell.co.uk). I designed and maintain her website and also produce all the photography that illustrates it, and any other marketing images that she needs. In some ways Laura is the dream client, she does not 'art direct' me and lets me do my own thing - though sometimes I get too arty and she asks for more straightforward pictures. In other ways she is a poor client, she never pays me, she hates every portrait I have ever taken of her and she does expect me to know what she has in mind to illustrate what she is doing...

None of these four pictures is of Laura, they are of Rosa who works for Hand and Eye Press. Laura recently produced an edition of one of her prints with Hand and Eye, they are a fabulous Letterpress printer in London producing beautiful work. We both felt that this needed recording so I went along to photograph the work.

These pictures were taken with an Epson RD-1, a camera I love, it has a 6 Mp sensor which produces files of a good quality, I wouldn't blow them up huge but I have yet to reach the limit. The nice thing about the RD-1 for me is that it handles very like a Leica, I had those in the past but sadly sold them. It does have automatic and I do use it but it is as near to a mechanical digital camera as you are likely to get... My own, self imposed, brief was to capture the setting, the machinery and the process in a dynamic way whilst still demonstrating just how 'hands on' the procedure is. If I had just set my camera to 'Program' I think it would have been very difficult to do this.

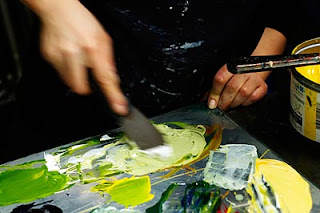
The first picture is of Rosa mixing ink to the correct colour, this will have been hand held at a 15th or possibly a 30th, slow enough to get a little movement in the hand and with enough depth of field to show the pallette. The next picture is of one of Laura's prints being dragged into the proofing press, guided by Rosa's finger. this will have been on a table-top tripod held against the wall probably at 1/2 or 1/4 of a second. Plenty of depth of field, enough sharpness in the hand whilst the print is almost fully blurred. Picture 3 is an almost abstract motion blur of Rosa turning the handle on the press. And the final picture shows what letterpress is really all about, moveable type, set and ready to print, deliberately photographed with the aperture wide open to get minimum depth of field, drawing attention to the type in the foreground.


None of this is difficult to do, it is all basic photographic technique but if you have not had a good grounding in the fundamental 'craft' of photography it is unlikely that you would stumble on any of these pictures accidentally. Knowing what it is that the controls on your camera do - not just that they put more or less light on the film or sensor, but just what a wider aperture will achieve or how well something can be illustrated with a carefully chosen amount of motion blur - these are the things that make photography such an immensely powerful illustrative medium.

All of this can be learned from digital equipment, none of it is the exclusive domain of film, but I promote playing with film and 'toy cameras' because they force you to learn whilst most digital cameras allow you not to have to learn.

So the crux is, what is better, living in a blissful but bland ignorance or learning through play?

I just hope my wife doesn't catch on about my playing with my toys in the office - and make me grow up!

Sunday, 11 July 2010

The Wasp's Nest Bloggette

I was looking for something in the attic this morning when I found what looked at first to be a screwed up tissue. What it actually was was the nest if a Paper Wasp. I believe they are made by the wasp from chewed up wood pulp but they are structures of incredible fragility and beauty. Needless to say I thought it would be interesting to try and photograph it. This time out I used a Holga 120N, the most basic camera Holga makes, a plastic lens and no flash (just £28 from Minutefilm.co.uk!).

This time out though I felt that pinpoint focussing was essential, I could not rely as I have done in the past on taking pictures of subjects that are at an angle to the lens in the sure knowledge that somewhere they will have to be sharp. No, for this I had to be able to get the focus accurate using the magnifying paperweight I used before. The nest is 36mm across, so the picture is not far from a 1:1 reproduction ratio.

Using a tracing paper focus screen again I got the camera set up with the comb sharp and measured carefully, My paperweight has a focal length of exactly 80mm, you cant get a ruler in to measure because it is too long and the camera will be in the way. The way to do it is to cut a strip of card or wood to the right length. Before you load the film you check the sharpness on the focussing screen at the measuring stick distance from the subject.

I think I have demonstrated here that it works, using the stick I have got the inside and the top of the nest sharp, it only needs care and enthusiasm.

Anyway, what I cannot decide is which is better, I like them both, the first because of the way the delicate internal structure is sharp and the second because that same structure is just a soft pattern.

The pictures were taken on Ilford Delta 3200, again the grain really lends itself the both the subject and the method. I'll be writing a short 'how to' guide on starting out with closeup photography to put on my website, I'm just a little concerned at the moment that the results are actually rather better than most people seem to expect from their Holgas but that is a hornets nest I'm quite happy to kick!


Friday, 9 July 2010

Photography as an Event

I'm sure you can imagine my delight when my son Jim shared this image with me on facebook. It was taken by a friend of his called Annah Legg, she is at the same university, the picture is of her and her flatmates at their 'digs' (over a diner where you can get obscene stacks of pancakes with bacon and maple syrup!)

For me there is a delicious irony in the fact that this polaroid picture has been photographed with a mobile phone in order to share it with a wider audience via Facebook. If one were to be strictly logical about the situation then obviously the picture would have been taken with the mobile phone in the first place. If it had though then I for one would probably not have given it a second glance. There is something so very special about Instant Photography - Polaroid in particular - it makes an event out of photography.

I honestly do not believe that most people would go to the trouble of setting up a photograph like this one only to take the picture with a phone - no, this required the arranging of the flatmates at their respective windows, the enlistment and briefing of a photographer (Jim tells me that it was a complete stranger who happened to be walking past! - which, if true, makes the story even better) and a clear idea of what could be expected, in short planning.

Then, when the Polaroid has been taken you have that excitement of waiting while the picture emerges from the chemical soup between the layers into some approximation of what you had hoped for. In this case I'm sure Annah and her flatmates must have been dead chuffed!

Having seen the picture on Facebook (currently Annah's profile picture) - I got in touch with Jim and asked him if he could get the original, or a scan so I could write about it. Well there do seem to be some differences... I tried to figure out from the pictures which one was the wrong way around and which was the closest to the correct colour but in the end I felt that it didn't matter...

It's a great picture and it celebrates the fun side of photography.

I could have left it there, with a huge vote of thanks to Annah for agreeing to let me write this stuff about her - without discussing the circumstances with her at all so I hope the actual 'event' was not too far from what I have described... However, I thought I should have a look at her pictures on Facebook. This one was such fun I thought there might be more - and there were! plenty and of a great standard.

I chose two more, the first here because again it is a picture of a Polaroid - a very nice Polaroid. I like this on several levels, I like it because it is both a nice Polaroid picture and a nice picture of a Polaroid, in a way this makes Polaroid both the material and the subject.

The last picture so beautifully illustrates another great charm of Polaroid I just couldn't resist. Four friends recording their having been together. A Polaroid taken, by the looks of it, with a great deal of hilarity and then inscribed by each of them. That is a real 'Polaroid' thing, the possession of a physical object straight away, not a list of binary code that needs to be extracted by a computer but a proper photograph.

So, thank you Annah for so beautifully illustrating my thoughts about Polaroid, making an event out of photography and for enjoying photography with such abandon!


Tuesday, 6 July 2010

Worth the Weight...

As a further development of some of the ideas I have blogged about over the past few months I wanted to play a little more with close-up photography with a Holga. I have been enjoying the Holga 135BC (Black Corner) camera that I have - and which you could have too for just £40 from Minutefilm.co.uk. The combination of the Holga and a fast, grainy film gives a 'feel' that I really like. Until now the lens I have been adding to the Holga to get closer has been a 'Linen Tester' a sort of folding magnifying glass much used by old fashioned graphic designers like my brother... however I found an old paperweight that had been given to me years ago and I thought I would give that a go instead. It is a lens, a 'plano convex lens' for the techies - that is a lens that has one flat side and one domed side - but it is also a piece of marketing handed out by my former employers: Hasselblad.

Its main advantage over the linen tester is that the focal length is a little longer so the close-ups are not quite so extreme. I like extreme but one can have too much of a good thing... The paperweight is also a bit bigger than the linen tester so there is no cut off (which with the linen tester slightly added to the black corner effect).


So, having assembled the things I needed:
Paperweight - to use as a lens.
Tracing paper to check the focus distance before loading the camera.
A roll of masking tape for attaching both the paperweight and the tracing paper.
A small piece of wood to measure the fixed focus distance during the picture taking.
A camera, a tripod and a cable release,
and of course half a brick and some more masking tape to hold the subject in place!

This may all sound rather hit and miss and the first time I did it I did get it wrong more often than I got it right. However the more I play with it the more often I get something like what I expect. Really the only serious problem I have with this process is that it is not possible to frame accurately since the viewfinder bears no relationship to what the lens is pointing at so you have to do the best you can aligning things by eye.

The 3 black and white pictures you see here are full frame 35mm, scanned from TMAX 3200 negatives. I have adjusted the contrast, and spotted them in Photoshop and sharpened them slightly so that they work at this size. Otherwise this is exactly what I got!

Little did I suspect when I left Hasselblad that I would end up using a Hasselblad lens on my Holga! But it has been worth the 'Weight' (sorry about that one...).